
Using a sandbox Canvas course
-
A video showing this process is below.
- Choose the + Folder button.
- Name the folder and click Create Folder.
- Select the files you want to move into this folder.
- Click the three vertical dots above the files listing.
- Choose Move To and select the correct file folder.
- Click the Move button.
-
To move materials from a sandbox archive course into a teaching course:
- In the destination course (the course you want to copy files into), select Settings at the bottom of the course’s navigation pane.
- In the right menu, select Import Course Content.
- Open the Select Content Type dropdown, and select Copy and Canvas Course. Don’t worry, you won’t copy the entire course.
- Search for your sandbox course. Normally, this is named Your Name sandbox or Your Name Archive.
- Under Content, choose Select Specific Content.
- Click the button Add to Import Queue.
- Your import will begin to process. You will see an indicator under Status, and once the import is complete, the Status will change to Completed.
- Double check that the files transferred properly to your course by looking in your Files section of the course.
Using Box for class materials
-
Create course-specific shared folders that contain only the files you’re actively using. Keep older or archived materials in separate, non-shared folders.
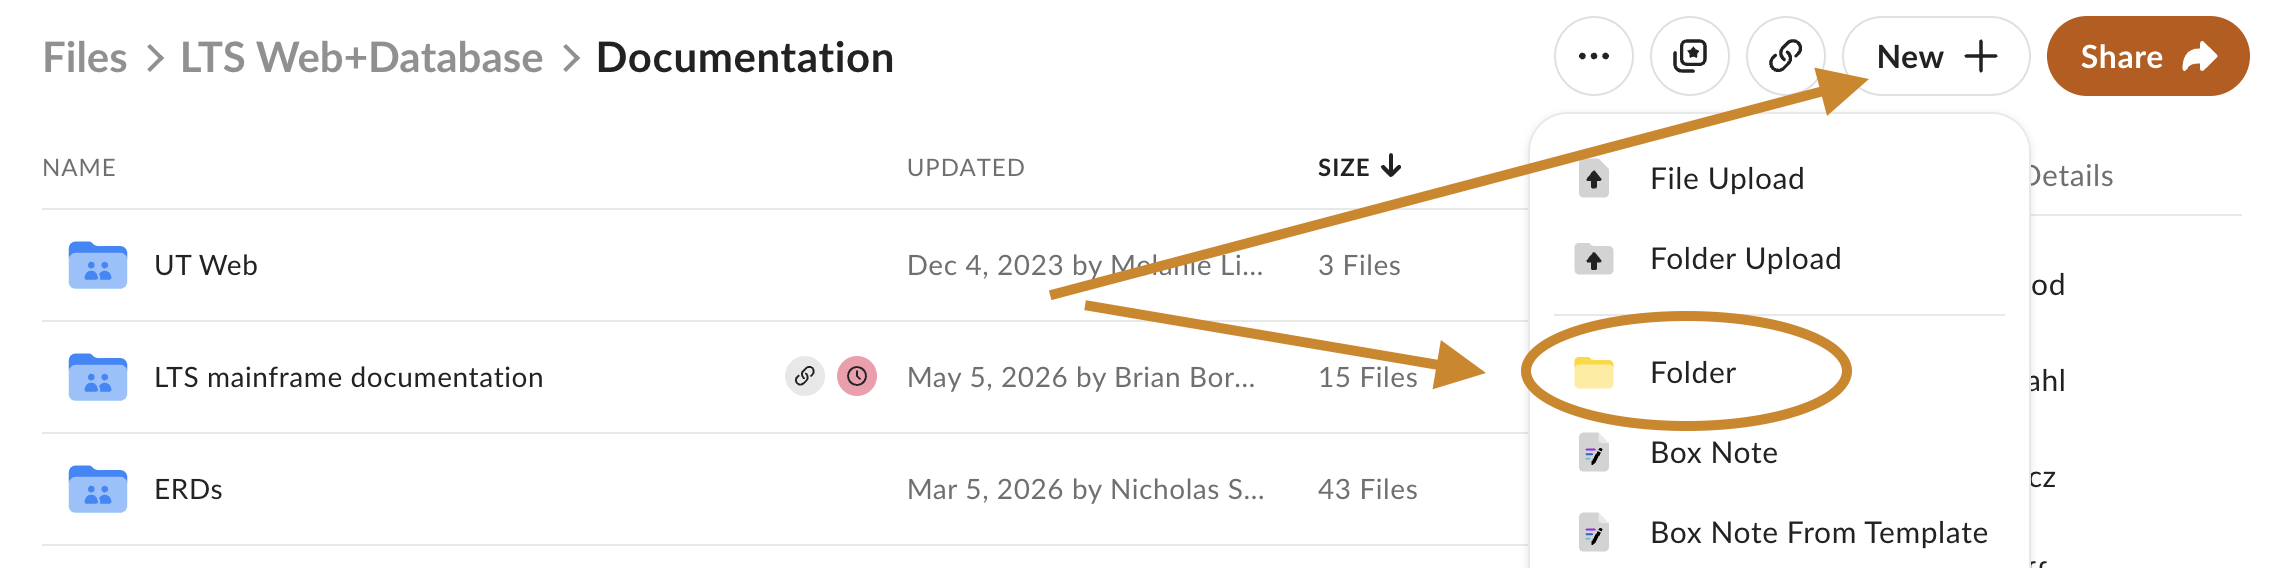
- In Box online, select New.
- Choose Folder.
- Name the folder and click Create.
-
You can share an entire folder as well as individual files in Box.
Learn about sharing options or how to add student emails to access folders.